
When it comes to security systems, Hikvision cameras have made a name for themselves due to their cutting-edge technology, reliability, and affordability. Whether you’re a business owner in Manhattan or a homeowner in Queens, securing your property is a top priority. Hikvision cameras offer high-quality surveillance, giving you peace of mind knowing your property is safe.
In this guide, we’ll dive into everything you need to know about Hikvision camera installation NYC. We’ll cover the basics of Hikvision cameras, why they’re a great choice for the Big Apple, and provide a step-by-step guide to installing them, including tips for both DIY enthusiasts and those looking to hire professional services.
Why Choose Hikvision Cameras for Your NYC Property?
Before jumping into installation, it’s important to understand why Hikvision is the go-to brand for so many people in New York City. There are several key reasons why this brand stands out:
- Advanced Technology: Hikvision cameras offer high-definition video quality, night vision, motion detection, and even artificial intelligence (AI) features like facial recognition.
- Wide Range of Products: Hikvision provides a broad selection of camera types, from bullet and dome cameras to PTZ (Pan-Tilt-Zoom) cameras, giving you the flexibility to choose the right camera for your specific needs.
- Affordable: Compared to other brands with similar features, Hikvision cameras are competitively priced, making them an affordable choice for many NYC residents and businesses.
- Scalability: Whether you’re looking to secure a small apartment or a large commercial building, Hikvision cameras can be scaled to meet your security requirements.
Preparing for Installation: What You Need to Know
Installing a security camera system in NYC involves more than just picking a camera and sticking it on the wall. There are several factors to consider before installation:
1. Check NYC Regulations
New York City has specific regulations regarding the installation of security cameras. For example, in commercial properties, businesses are required to notify people that they are under surveillance. Make sure you check the local laws to ensure your Hikvision camera installation is compliant.
2. Assess Your Security Needs
Before purchasing your Hikvision cameras, take some time to assess your security needs. For instance:
- What areas do you want to cover?
- Are there any blind spots?
- Do you need indoor or outdoor cameras?
- Do you require features like night vision, motion detection, or two-way audio?
By answering these questions, you can determine the best Hikvision camera models and how many you’ll need for your property.
3. Plan the Installation Process
Decide whether you want to go the DIY route or hire a professional for your Hikvision camera installation in NYC. If you’re tech-savvy, you may feel comfortable installing the system yourself. However, for a larger installation or more complex systems, it’s often best to hire a professional.
Step-by-Step Guide to Installing Hikvision Cameras
Once you’ve selected your cameras and are ready for installation, follow these steps for a successful setup.
Step 1: Choose the Right Camera Placement
The placement of your cameras is crucial to ensuring maximum coverage and effectiveness. Here are some tips:
- Entrances and Exits: Make sure to install cameras at all primary entrances and exits. This ensures you can track everyone who comes in and out of the property.
- High Traffic Areas: Place cameras in areas with a lot of foot traffic, such as hallways, common areas, and driveways.
- Corners: To cover large areas, consider installing cameras in the corners of rooms or the exterior of the building.
- Avoid Obstructions: Ensure the cameras aren’t blocked by any objects like trees, fences, or decorative features.
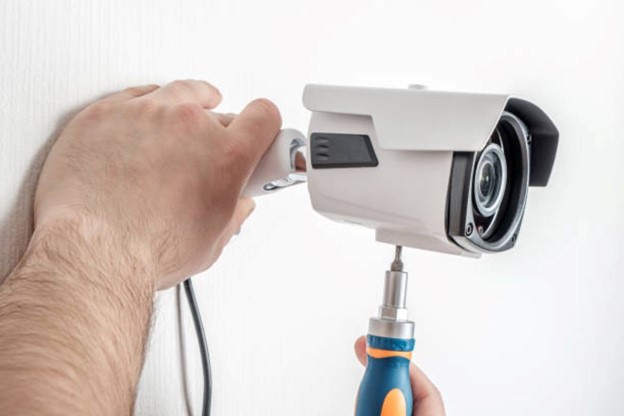
Step 2: Mount the Cameras
Once you’ve selected the ideal spots, it’s time to mount the cameras. Most Hikvision cameras come with a mounting bracket and screws, making the process relatively straightforward. Here’s how to do it:
- Mark the Location: Hold the mounting bracket in place and mark the spots for the screws with a pencil.
- Drill the Holes: Using a power drill, make holes for the screws. If you’re installing outdoor cameras on brick or concrete, make sure you have the appropriate drill bit for the surface.
- Secure the Camera: Attach the mounting bracket to the wall using screws, and then securely attach the camera to the bracket.
- Adjust the Angle: Once the camera is mounted, adjust its angle to cover the desired area. Most Hikvision cameras have a wide field of view, but you want to ensure that no important areas are missed.
Step 3: Run the Wires
If you’ve chosen wired cameras, the next step is to run the wires from the camera to the recording device. Here’s what to keep in mind:
- Use the Right Cables: Hikvision cameras typically use Ethernet cables for power and data. Make sure you have CAT5 or CAT6 cables on hand.
- Hide the Cables: To prevent tampering and maintain a clean look, run the cables through walls or use cable management systems to hide them.
- Connect to the NVR: Once the cables are run, connect them to your network video recorder (NVR) or digital video recorder (DVR), depending on your setup.
Step 4: Configure the Cameras
After the physical installation, you’ll need to configure the cameras:
- Connect to Your Network: For most Hikvision cameras, you’ll need to connect them to your local network via Ethernet or Wi-Fi, depending on the model.
- Access the Camera’s Interface: Hikvision cameras come with a default IP address that you can use to access the camera’s interface through a web browser.
- Set Up User Accounts: For added security, change the default username and password to something unique.
- Adjust Settings: Adjust the camera’s settings for things like resolution, motion detection, and recording schedules.
Step 5: Test the System
Before finalizing your Hikvision camera installation in NYC, make sure everything is working as it should:
- Check Video Feeds: Look at the live video feed from each camera to ensure there are no blind spots and the video quality is up to par.
- Test Night Vision: If your cameras have night vision, test the feed in low-light conditions to make sure the image is clear.
- Motion Detection: If you’ve enabled motion detection, test the system by walking in front of the cameras to see if they record as expected.
Hiring a Professional for Your Hikvision Camera Installation in NYC
While DIY installations can be cost-effective, hiring a professional is often the best option, especially for large or complex setups. Here’s why:
- Expertise: Professionals have experience with Hikvision camera installation in NYC and understand the unique security needs of New York properties.
- Proper Equipment: A professional installer will have the right tools and equipment to mount your cameras safely and securely.
- Efficient Setup: Professionals can complete the job more quickly and ensure that the cameras are positioned for maximum coverage and effectiveness.
- Warranty and Support: Many installers offer warranties on their work and ongoing support if you run into any issues with your system.
Maintaining Your Hikvision Cameras
Once your Hikvision cameras are installed, regular maintenance is key to ensuring they continue to operate effectively. Here are some tips for keeping your system in top condition:
- Regularly Clean the Lenses: Dust, dirt, and moisture can collect on the camera lens, reducing the image quality. Clean the lenses every few months with a soft cloth.
- Check the Cables: Over time, cables can become loose or damaged. Inspect the wiring periodically and replace any cables showing signs of wear.
- Update the Firmware: Hikvision regularly releases firmware updates that improve the performance of your cameras. Make sure to keep your system up-to-date.
- Test the System: Periodically test the cameras and their features, such as night vision and motion detection, to ensure everything is functioning properly.
Final Thoughts on Hikvision Camera Installation in NYC
Installing Hikvision cameras in your NYC property is an excellent way to enhance security and gain peace of mind. Whether you choose to go the DIY route or hire a professional, following the proper installation steps ensures your cameras perform optimally.
For those looking to protect their home or business with a reliable and affordable security system, Hikvision camera installation in NYC is the way to go. With proper planning, installation, and maintenance, your property will be well-protected for years to come.